|
|
|
|

Language: 日本語 | English
This article provides you with information on how to use CIS servers over SSH/SCP.
By using SSH/SCP, you can access to your home directory.
| Host | ID | Available for | Purpose |
|---|---|---|---|
| ssh.cis.k.hosei.ac.jp | CIS ID | Students/Teachers | File Access / Computing |
| SUBDOMAIN.cis.k.hosei.ac.jp(*) | projectXXX | Project Server users | Contents management on 情報科学部サブドメインサービス? |
* Replace SUBDOMAIN with the subdomain you applied
* Use projectXXX as ID to log in Project Server
* Access UserTools with accounts if you want to change your Password
For each undergraduate students, the maximum amount of resources available for use are limited as listed below.
Although there are no limits set for graduate students and other users (professors and staff members), please do not use much resources as the server is shared by everyone.
| Item | Limit |
|---|---|
| Maximum amount of memory per process | 1024 MB |
| Maximum number of processes to run at a time | 32 processes |
These limitations may be reviewed as needed.
This article is written based on the following environment.
Laptops lent from CIS are shipped with these programs installed (though the version may different).
SSH/SCP is the secure remote shell environment/file transferring method based on the public key encryption.
When using public key encryption, you need your own private/public key pair.
Use PuTTY (Japanese Version) for SSH client (You can use English version as well, but it won't work correctly with Japanese file names).
Download and decompress the file, and then launch the PuTTYgen.exe.
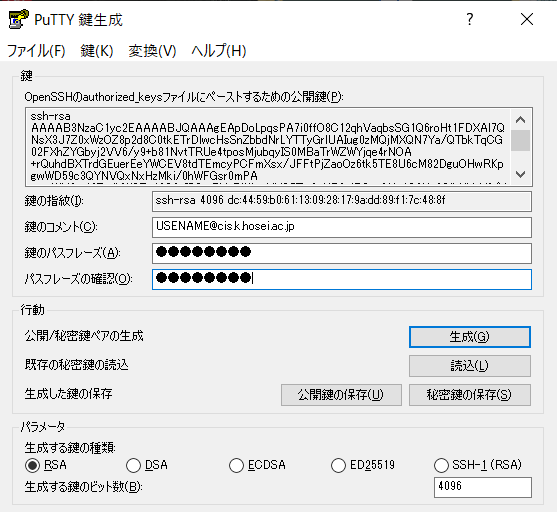
Check [RSA] radio button at the bottom, change [Number of bits in a generated key] to 4096 and click the [Generate] button.

Keep your mouse moving on the window until the progress bar reaches its end. This process is required to generate random numbers.
A pair of Private/Public key will be automatically generated.

Fill in the [Key comment], [Key passphrase], and [Confirm passphrase] field. Never forget the Key Passphrase as it is required every time you connect to the server.
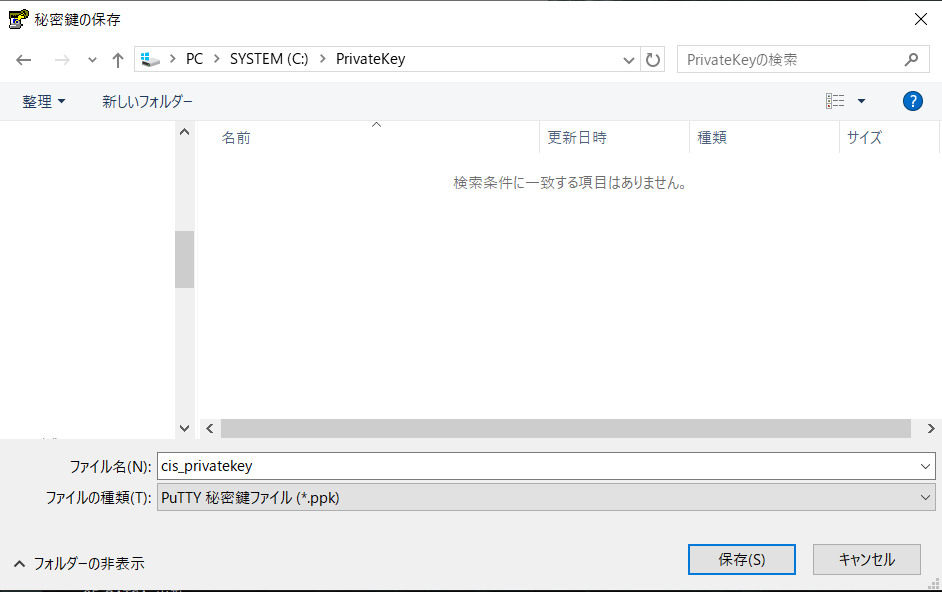
Click on the [Save private key] button and save the key to the location you like.
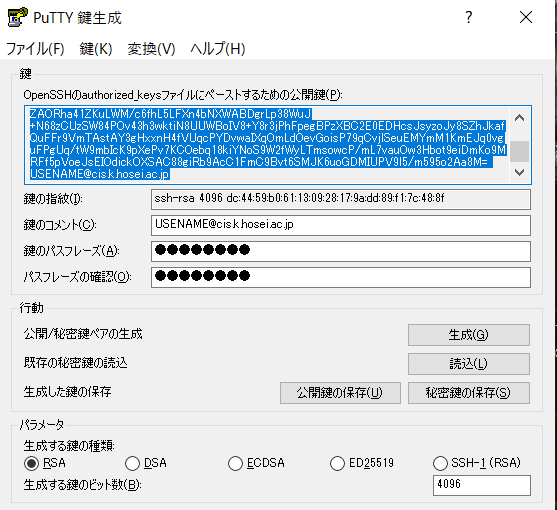
Create an empty text file with your favorite editor. Copy and paste the whole text of [Public key for pasting into OpenSSH authorized_keys file] field into the file, and save it with the name "authorized_keys".
Now you have your own private and public key pair.
Never transfer your Private key over the network (like FTP or File Sharing).
Use removable media when you need to move your key.
Before connecting to the server, you need to register your Public key to your CIS account.
This section describes about connecting to the remote server using PuTTY.
We'll use ssh.cis.k.hosei.ac.jp as an example. Replace the hostname with the server you're connecting to.
You need to download the following reg file that contains the template settings to connect to the CIS servers.
Right-click on the downloaded file and choose [結合] (Merge).
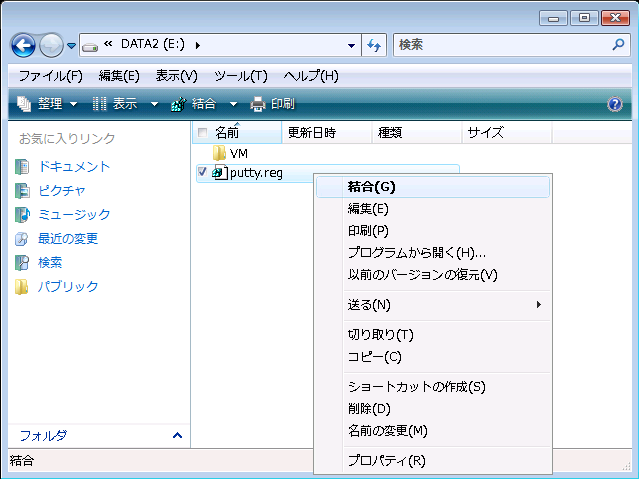
Template settings are added to your PuTTY profile.
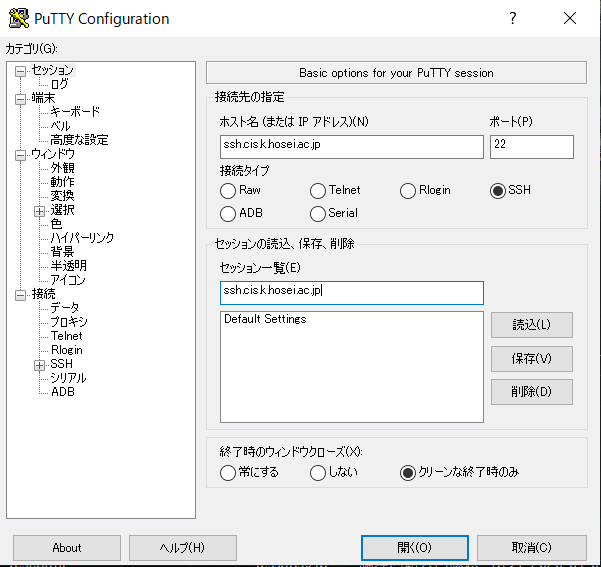
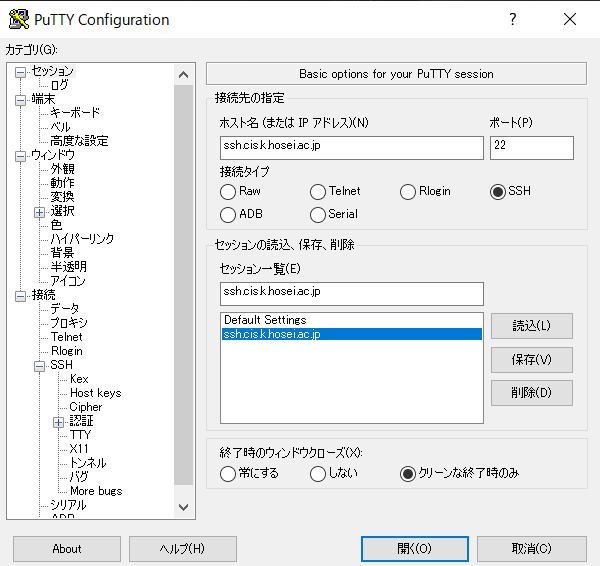
Launch PuTTY, select ssh.cis.k.hosei.ac.jp from the [Saved Sessions], and click the [Load] button.
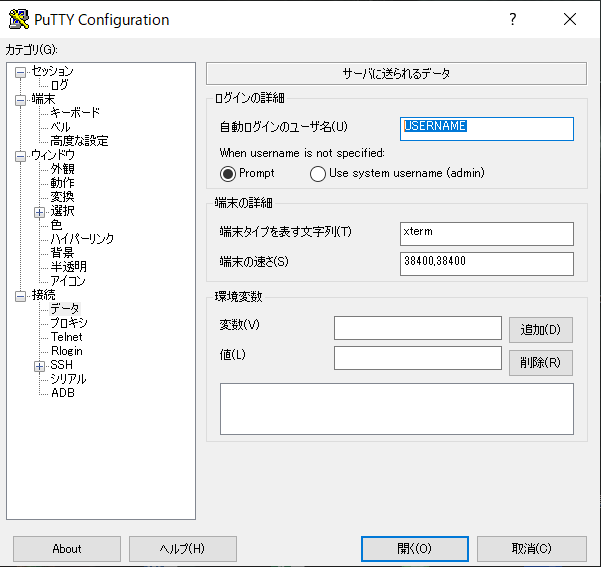
First of all, you need to set the user name. Choose [Connection] -> [Data] from the tree on the left side.
Enter your CIS account name to the [Automatic Login User Name] field.
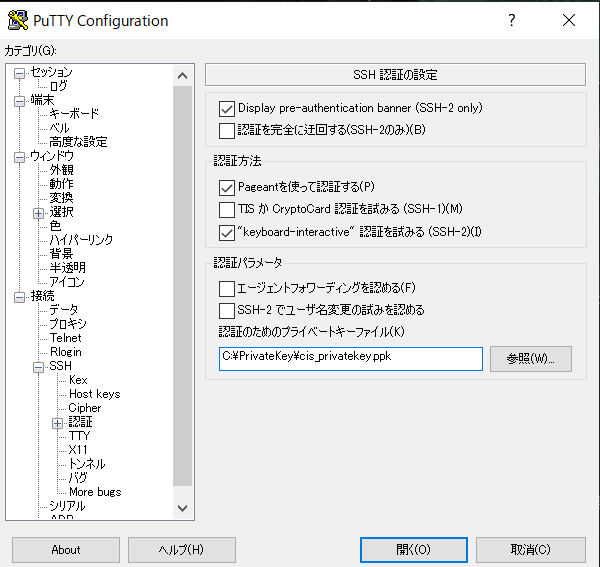
Secondly, select [Connection] -> [SSH] -> [Auth] to specify the Private key.
Click on the [Browse] button and choose Private key you generated in the previous section.
Finally, select [Session] from the tree and click the [Save] button to save the changes you made.
Now the configuration is finished. Click on the [Open] button to connect to the server.
Next time you connect to the server, just double-click on the session name in PuTTY.
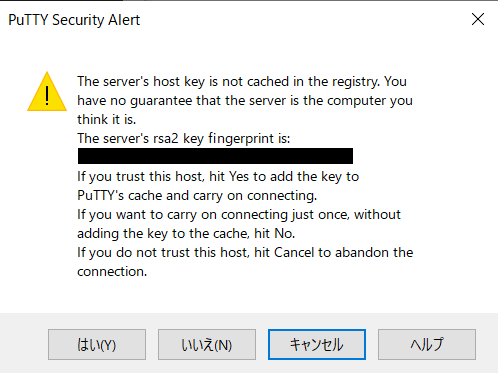
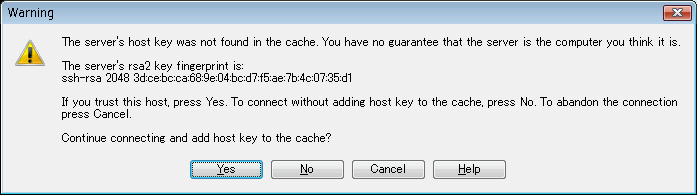
If you're connecting to the server for the first time, you need to accept the public key of the server. Click [Yes] when you're asked to do so.
Another window will be show up, and you're required to enter a passphrase.
Type the passphrase that you entered when creating the Private key.
Once the passphrase is accepted, you can use the remote shell.
This section describes about transferring (uploading and/or downloading) files with the remote server over SCP.
By using SCP, you can access to your home directory of the Laboratory (U: drive) from outside the Lab.
WinSCP is the recommended SCP client for Windows.
Before using WinSCP, you need PuTTY to be configured to connect to the server (see "Using PuTTY" section for details).
Download and install the program from the website above.
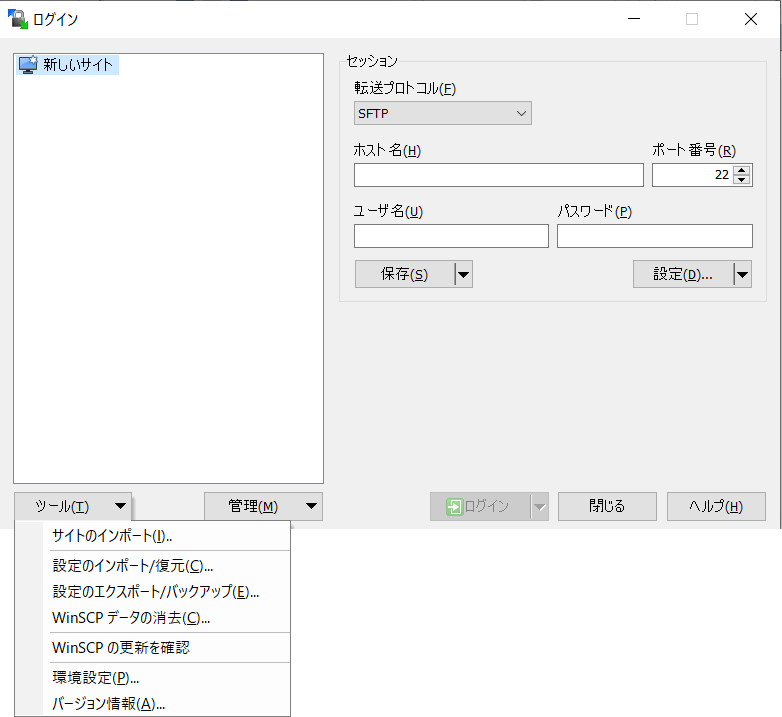
After installing WinSCP, launch it.
Click the [Stored sessions] from the tree on the left side, and hit [Alt] + [T] on the keyboard.
You'll see the menu at the lower-right corner. Select [Import...] from the menu.
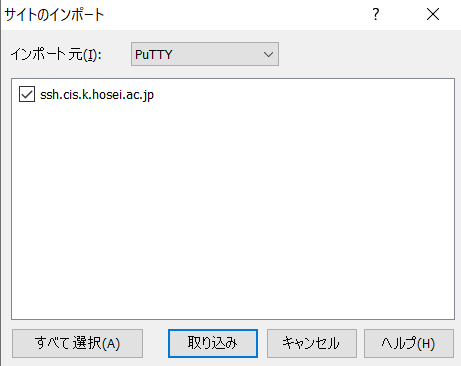
Sessions stored in PuTTY are listed. Check the session name you want to import and click [OK].
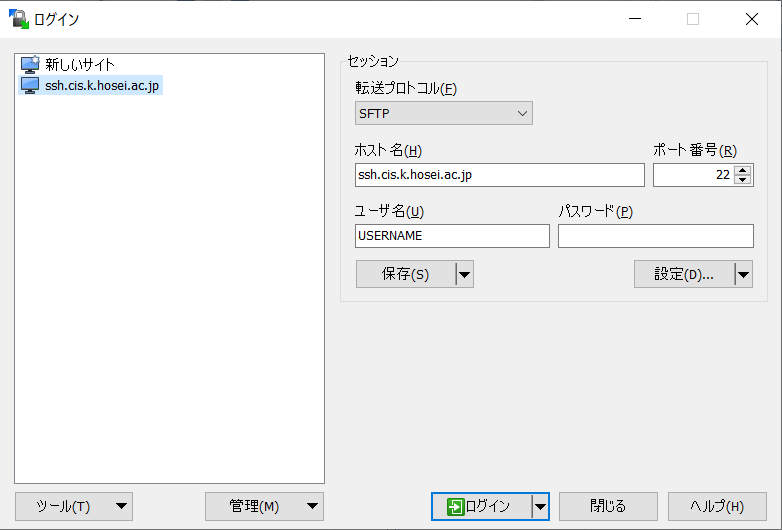
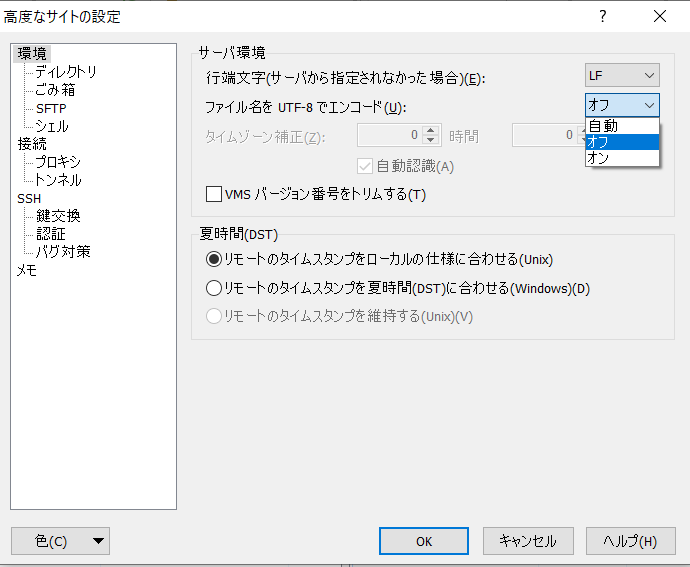
If you need to handle files with Japanese (or other non-ASCII character) names, select [Environment] and change [Server does not use UTF-8] to [Off].
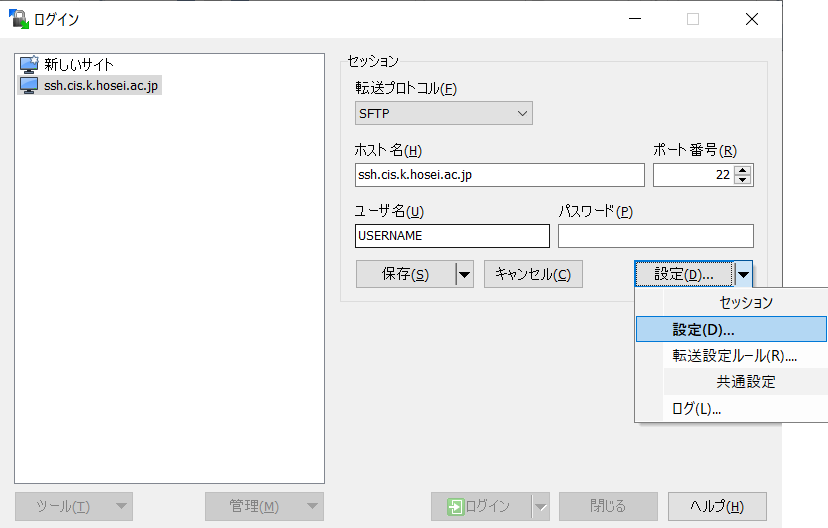
To save the changes you made, click the [Save] button. Clicking [OK] will overwrite the stored session.
Now the configuration is finished. Click on the [Login] button to connect to the server.
Next time you connect to the server, just double-click on the session name in WinSCP.
If you're connecting to the server for the first time, you need to accept the public key of the server. Click [Yes] when you're asked to do so.
Another window will be show up, and you're required to enter a passphrase.
Type the passphrase that you entered when creating the Private Key.
Once the passphrase is accepted, you can transfer files from/to the server.
The left column of the window represents the local harddrives (your PC), and the right column represents the server's drive.
If you're using Linux, maybe you already have software required to connect to the server over SSH/SCP.
$ ssh-keygen -t rsa
Follow the instruction of Registering Public Key section above.
Note that you need to use ~/.ssh/id_rsa.pub instead of authorized_keys file.
Use 'ssh' command to connect to the SSH server, and 'scp' to transfer files over SCP.
See the manpage for details (type 'man ssh' or 'man scp' in the terminal).
$ ssh -p 22 -i ~/.ssh/id_rsa USERNAME@ssh.cis.k.hosei.ac.jp
$ ssh -X USERNAME@ssh.cis.k.hosei.ac.jp
$ scp file USERNAME@ssh.cis.k.hosei.ac.jp:~/
$ scp -r USERNAME@ssh.cis.k.hosei.ac.jp:~/dir ./