How to use SSH/SCP
Table of Contents
Section titled “Table of Contents”- Introduction
- Generating Your Private/Public Key
- Registering Public Key
- How to connect to servers via SSH
- How to transfer files using SCP
Introduction
Section titled “Introduction”This article provides you with information on how to use CIS servers over SSH/SCP.
By using SSH/SCP, you can access your home directory.
Servers
Section titled “Servers”| Host | ID | Available for | Purpose |
|---|---|---|---|
| ssh.cis.k.hosei.ac.jp | CIS ID | Students/Teachers | File Access / Computing |
| SUBDOMAIN.cis.k.hosei.ac.jp(*) | projectXXX | Project Server users | Contents management on Project Server |
* Replace SUBDOMAIN with the subdomain you applied
* Use projectXXX as ID to log in Project Server
* Access CIS User Tools with accounts if you want to change your Password
Shell Account on ssh.cis.k.hosei.ac.jp
Section titled “Shell Account on ssh.cis.k.hosei.ac.jp”For each undergraduate students, the maximum amount of resources available for use are limited as listed below.
Although there are no limits set for graduate students and other users (professors and staff members), please do not use much resources as the server is shared by everyone.
| Item | Limit |
|---|---|
| Maximum amount of memory per process | 1024 MB |
| Maximum number of processes to run at a time | 32 processes |
These limitations may be reviewed as needed.
Software Environment
Section titled “Software Environment”This article is written based on the following environment.
MacBook
Section titled “MacBook”- OpenSSL 3.5.1 1 Jul 2025
Laptops lent from CIS are shipped with these programs installed (though the version may be different).
Generating Your Private/Public Key
Section titled “Generating Your Private/Public Key”SSH/SCP is the secure remote shell environment/file transferring method based on the public key encryption.
When using public key encryption, you need your own private/public key pair.
- If you already have a private/public key pair, you can use the same key instead of generating the new one.
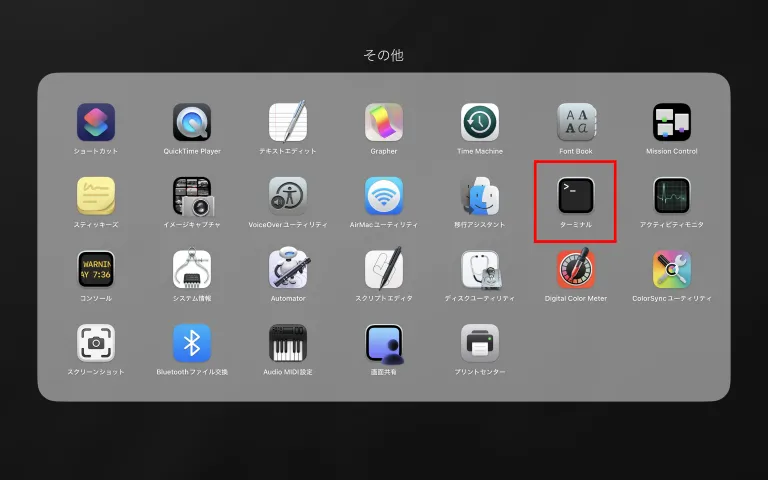
Launch MacBook Terminal App.
You can launch Terminal by [LaunchPad] > [Other] > [Terminal].
Run ssh-keygen command to generate a private/public key.
This time, we generate an Ed25519 key since it’s recommended now.
% ssh-keygen -t ed25519 Generating public/private ed25519 key pair. Enter file in which to save the key (/Users/USERNAME/.ssh/id_ed25519):Identify the filename to store private key. If you want to keep the default settings, just hit Enter without typing anything.
Enter passphrase for "/Users/USERNAME/.ssh/id_ed25519" (empty for no passphrase): Enter same passphrase again:Enter passphrase of the private key. Don’t forget the passphrase. It’s used when you connect to servers.
After generating the keypair, Terminal will show the path of the private/public key and signature of the key.
Your identification has been saved in /Users/USERNAME/.ssh/id_ed25519 Your public key has been saved in /Users/USERNAME/.ssh/id_ed25519.pub The key fingerprint is: SHA256:12lsdypNSlaQKCEHo0qmMIH3kBkwjMc6pBY7fXQtpEI USERNAME@Mac.local The key's randomart image is: +--[ED25519 256]--+ |Bo.E =o+. ... | |o*O o.*... .. | |=+*+o.. .. . | |=O oo. o o | |o.o . S . O o .| | . = = o | | o o | | . | | | +----[SHA256]-----+Now you have your own private and public key pair.
Caution
Section titled “Caution”Never transfer your Private key over the network (like FTP or File Sharing).
Use removable media when you need to move your key.
Registering Public Key
Section titled “Registering Public Key”Before connecting to the server, you need to register your Public key to your CIS account.
- Go to 情報科学部サーバー用公開鍵設定 (Public Key Registration for CIS Servers) and login with your CIS account.
- Click the “公開鍵変更” (Change Public Key) link of the menu on the left side.
- Copy and paste the Public key and click the “変更” (Change) button.
How to connect to servers via SSH
Section titled “How to connect to servers via SSH”This section describes about connecting to the remote server using ssh command.
We’ll use ssh.cis.k.hosei.ac.jp as an example. Replace the hostname with the server you’re connecting to.
When connecting, please use your CIS account username (the USERNAME part).
$ ssh -i /path/to/key USERNAME@ssh.cis.k.hosei.ac.jpWhen you connect to the server for the first time, you will be asked whether the server’s host public key is trustworthy and whether you want to register it for connection.
You MUST confirm that the connection destination is not fraudulent if you know the server’s host public key in advance.
In the case of Project Server, you can view the server’s host public key on [公開鍵変更] page in CIS User Tools.
How to transfer files using SCP
Section titled “How to transfer files using SCP”This section describes about transferring (uploading and/or downloading) files with the remote server over SCP.
We’ll use ssh.cis.k.hosei.ac.jp as an example. Replace the hostname with the server you’re connecting to.
- Uploading the file named ‘file’ of the current directory to the home directory of the server
$ scp file USERNAME@ssh.cis.k.hosei.ac.jp:~/- Downloading ~/dir directory (including subdirectories) of the server to the current directory of the local drive
$ scp -r USERNAME@ssh.cis.k.hosei.ac.jp:~/dir ./:-r:Copy recursively